Friday, August 31, 2012

Paint Chips!

Today we stopped at Walmart briefly for some white spray paint so I could finish painting what bottles I left to finish for still life drawing. I guess you could say I went a little paint chip crazy!!! I plan on creating activites with these for early finishers...Does anyone have any creative ideas for using these? I've found quite a bit on pinterest but they just don't seem to jive with how I run my classroom...I'm thinking about turning the single color ones into a memory game as I got two of each color...put a painting on one and the artist name and title on the matching color...then when they match them, they can tell they got it right by the color behind each answer...

For the longer ones, I'm thinking about cutting them up and creating a set of game instructions for ordering them from darkest to lightest, tints versus shades, rainbow order, etc.

Wednesday, August 29, 2012

Art Teachers of Saint Lawrence County Unite! (Well, some of them!)

Today we had a regional art teachers meeting to try and work out regional assessments.  We attempted this back in March, but never got very far.  Probably only 1/3 of the teachers were present today, but I think we accomplished a lot more than if everyone would have been there!

Unfortunately, I was the only all elementary art teacher present (everyone else was K-12, 3-8, 5-8, etc.).  The assessment rubric we created was geared towards Jr./Sr. high, but is easily changed for lower grades.  What we ended up deciding on for a regional assessment (for those who would want to use it), was to do an observational drawing.  It could be as simple as an object, such as your hand or shoe, or as advanced as a 3-day still life drawing.  We created a basic, adjustable rubric that included the categories: (1)Technical Accuracy (shape, proportion, contour, detail), (2)Shading/Value (light source, gradient scale, shadows and highlights), (3)Line (range of lines, both real and implied), (4)Composition (positive and negative space, fully developed drawing), and (5)Craftsmanship (no tears, smudges, folds, etc; artwork created and maintained in a professional manner).

Now, a lot of our concerns that we discussed included giving the post-assessment.  First, the guidelines say that we must have another person in our room when giving the assessment.  This could be the person who will fill out the assessments (as we cannot assess our students on the final assessment to prevent favoring a student), a substitute, or a random faculty member.  What happens if our district can't provide us this extra person if we decide we will be doing a 3-day still life drawing?  Unfortunately this isn't something we can control...it's a district responsibility.  I know at my district, it's virtually impossible to find subs at the end of the year.  Hopefully, the districts across the board will report back to the state that it is nearly impossible to do this, or we will have to actually have a testing time to give our assessments at the end of the year.

Our other concerns with the post-assessment is how much we can guide students during it?  Do we just tell them to draw a still life based on what they've learned?  Tell them they have 3 days to do it?  Or can we give prompts..."Remember to check your cast shadows!"  True, this is a final assessment and students should be able to do this based on what they've learned without prompting, but how often do you do an art project that you don't have to remind students what to look for, or give students the extra prompting so they do their best work?  Obviously we can't draw for them, which hopefully not very many art teachers do anyways.  We decided that the best way to "get around this" or deal with that questions was to create a check list for the students to attach to the back of their project.  When the student thinks they're done, we can flip it over and review the guidelines with the student to easily point out that they need to go back and check their value scales...similar to the way someone administering a regents exam might pick up an early finishers exam only to find they didn't fill out questions 1-20 on the multiple choice and will tell them to go back and do it.

And remember when I said all my assessment rubrics were completed, but may need some tweaking?  Well, they do.  Not in terms of what I am assessing, because those are what I assess when I look at the projects, but in my wording.  I created my rubrics based on Marzano, and even though that is the system my school is using, I can't use his wording of "with assistance" and "could not complete even with assistance" because we technically aren't supposed to assist the students during these final assessments.  At least it won't be too much work to re-word my rubrics!

Tuesday, August 28, 2012

Bulletin Boards

Today I went into school for a few hours to work on my bulletin boards outside my classroom.  I have one large one and a smaller one that I use to display artwork.  Until I get our first projects finished, I always try to put stuff on the bulletin boards that will relate to what the art theme is for the year.  This year is nature!

I cut apart some old calendars, used some of my scrapbooking paper, and found some cool photos of nature through a Google search.

For this board, I went through my art examples and pulled out some examples that my students should recognize, particularly VanGogh and Monet.

Such a bad picture, but this is my "No Name" bin in the front of the room.

I also started decorating my door, but it's not finished yet so I don't want to share!!! :)

Monday, August 27, 2012

One week left!!!

Only one more week till school starts for me and I'm going out of my mind with boredom!  I can't wait to start school and have art projects to share!  I spent about seven hours in my room today, organizing my paint, putting the rest of my requisitions away, finishing bulletin boards, and laminating things for later use.  I wish I could relax, but I'm excited to start this school year.  Even though it may be more stressful with the new Common Core and A.P.P.R. stuff, these changes are forcing me to look at what I've been doing the past two years with different eyes and I'm liking the changes I am making!  Thanks to Pinterest and all the other art blogs out there for inspiring new ideas and letting me borrow some too!

I think the only thing I have left to work on until school starts are little art games for when I have students finish early.  (Paint chip games, sorting games, matching games, etc.)

My sink area...I taped various brush posters around the sinks.  Not sure they will last long, especially the one taped on the counter, but we'll see!  I also decided to move my dish rack from the back counter where my taller sink is to the shorter sinks.  Students always stacked the cleaned, wet paint palettes on the counters instead of walking around to put them in the rack.

My Artist of the Week bulletin board!  I used some cool tie-dyed duct tape to hang the black paper so I wouldn't have to lose any of my bulletin board space to hang artwork.  I also wrote each homeroom teacher's name and grade along the bottom of each paint can so everyone knows which class the artists come from!

Finished my classroom management chalkboard...I created six jobs to rotate the tables through.  I also printed off three of each chore because when we use clay, for example, no one is allowed to touch another's clay piece and EVERYONE has to help wash and dry tables.  This way, I can assign 3 tables to wash and 3 tables to dry.  (I attached these to my board using Velcro with a sticky back.)  I also added the art noise meter I found floating around on Pinterest and the "Show Me the Mona Lisa" poster with my Garfield parody!

Saturday, August 25, 2012

Rock & Gem Show

Today I went to a local Rock and Gem show with a friend.  While I went with no money in hand (for the intention of not giving myself an easy out to spend money!), I was still able to participate in a free crafting class.  I'm not sure, but I may go back tomorrow again to participate in the other two classes (creating a pendant out of a rock/shell/gem using wire and butterflies).  Today we made rock trees!  I'm thinking I could probably alter these to use with my kids in school...whether using pipe cleaners and beads with younger students, or doing these basic trees in my art club after school!
Step 1:  Cut 9 wires 15" long and twist like such using a hook tool.

Step 2:  Put all your wires together and twist the loose ends until you have about 1 1/2" left.

Step 3:  Split your ends into three sections of 6 wires and twist these together.

Step 4:  Using flat nosed pliers, get your roots to lay flat against your base of choice and glue into place.

Step 5:  The gentleman teaching us had us glue some extra stones on the base, just in case we lost any later off of our tree limbs.

Step 6:  Flatten out your tree branches.

Step 7:  Glue on your stones!

\
Step 8:  When I got home and it dried, I bent my trunk and branches a little.  Reminds me of a bonsai tree!

Here are some really awesome looking wire and stone trees one of the vendors was selling!  They are amazing!

Hmmmm, I'm feeling a new crafty hobby coming on for this years Christmas presents!!!

Thursday, August 23, 2012

When it rains, it pours!

I guess that old saying is true...and right now it's storming!  All of my school work has been put on hold for the last few days because of that darn vertigo!  I finally went to a doctor and was diagnosed with tension headaches (probably from staring at a computer screen all summer!) and benign paroxysmal positional vertigo.  So far, the meds aren't working very well so I have to go to physical therapy tomorrow to learn some exercises to try and straighten out my inner ear!

Then, today I had to take one of my kitties to the vet.  About three weeks ago he had an infection on his left front paw that we had to treat with antibiotics and a foot soak (which went over REAL well with a cat...).  Well, it has spread to his right front paw now, and they think he might have an auto-immune issue.  Luckily, he can't infect any of my other animals or people with it, but unluckily, he has to go into the vet on Monday to have a biopsy done so we can figure out how to treat it!  I won't even get into the amount of work our car needs in order to pass inspection by the end of the month...lol!  Teacher pay really stinks at the end of summer when funds have funds have run dry...

So anyways, enough venting.  Here are a few things I was able to work on the last few days.  I made a procedures checklist for the first week of school to make sure I don't forget anything with the kids!  With the younger kids, I will probably teach these to them over the course of 2-3 class periods since it's so much.  The older kids will be able to handle all of this information on the first day.  The only thing I'm changing drastically are clean-up procedures.
The only things I need to finish making for my classroom are the tattle monster (tissue box monster via Pinterest! and the Noise Meter.)

I also made two posters, one for line and one for shape:
This covers geometric and organic shapes, small and large shapes, etc.

This covers, horizontal, vertical, diagonal, thin, thick, dotted, curvy, zig zag, etc.


Tuesday, August 21, 2012

School Tool Training

Yesterday I spent eight hours at school going through School Tool Train the Trainee training. Whew! I think I am really going to take advantage of this program, including using grade book. In the past our school used Web2School and I was never required to put my assignments in it.

Does or did anyone else out there use School Tool? It has really made me think about my grading policy. I am going to have to totally revamp it! I used the previously set in place grading system by the teacher I replaced. All special teachers use letters to grade...E, S, N, and U.

Each day I would give every student a participation grade based on behavior and their participation, and then each project would receive a grade as well, sometimes two or three if there were multiple stages. However, now I think I'm going to have to change that! With common core and A.P.P.R., I will be using rubrics for just about everything and those will give me number grades. Since School Tool automatically does the calculations for you and can translate the number grades into letter grades, I need to figure out my grading categories and their weighting. Right now, I'm thinking of participation, unit mini projects, unit final projects, collaborative projects, and for the older grades, quizzes (which would only be weighted 10%, it's art class after all!).

So my question for this post is, how do you figure your grades for students...whether it is district determined or your policy?

Monday, August 20, 2012

T-minus 2 Weeks and Counting!

Before I jump into what I accomplished at school today...let me give you a glimpse as to what yesterday brought me!  Naturally, since we live out in the middle of nowhere, we expect our dogs to have run-ins with wild animals...deer, turkey, the occasional skunk...but let me tell you, I was not prepared for my first porcupine encounter!

My darling pups decided to go for a stroll outside of their boundaries and took off into the woods...about an hour later, they come back and I find my poor baby with quills in her snout!  Now, I'm normally a pretty calm and collected person...except when it comes to firsts with my dogs!  (You have to understand, we don't have kids yet, so our animals are stand-ins until we reach that time!)
So naturally, my husband was at work until about 7:30 and Delilah came home like this around 7:30.  Looking at it now, I realize she wasn't really hit that bad with them but of course, I freaked out and started crying!  And, of course, everyone I knew who has dealt with this type of thing before weren't answering their phones!  I called the hubby and told him to hurry home, pick up Benedryl and hydrogen peroxide...I was able to pull out about five quills once I calmed down enough, but the rest were too big and naturally, she was feeling my tension so Delilah started to freak out more!

Vern got home and after about an hour of pinning her down, almost getting our hands chomped off and listening to her cry like a little baby, we were able to pull out all of the remaining quills with pliers.
I believe we counted 16 quills in all!  To make matters worse, she apparently blamed me for all of this happening to her and gave me her "doggy silent treatment" for the next two hours while lavishing my husband with attention and kisses...darn dogs!
I don't know what's wrong with you guys, but I'm fine! (And yes, she managed to cover herself up like this!  Can anyone say spoiled pets???!!!)


So, needless to say, after that ordeal I needed to do some work to take my mind of things!  Today I spent another five hours at school organizing my paper cabinets, putting more stuff away, and hanging up my posters and such.
 This is my class storage system, courtesy of the previous art teacher.  I have four chalkboards the slide back and forth where I can store 16 boxes.  This year I finally made my own labels using my Cricket and scrapbook paper.  Since I have a Smartboard now, I don't utilize the chalkboards as much as I used to, so I have now made the top chalkbaord the place where I will post the daily jobs for each table.  
-------------------------------------------------------------------------------------------------
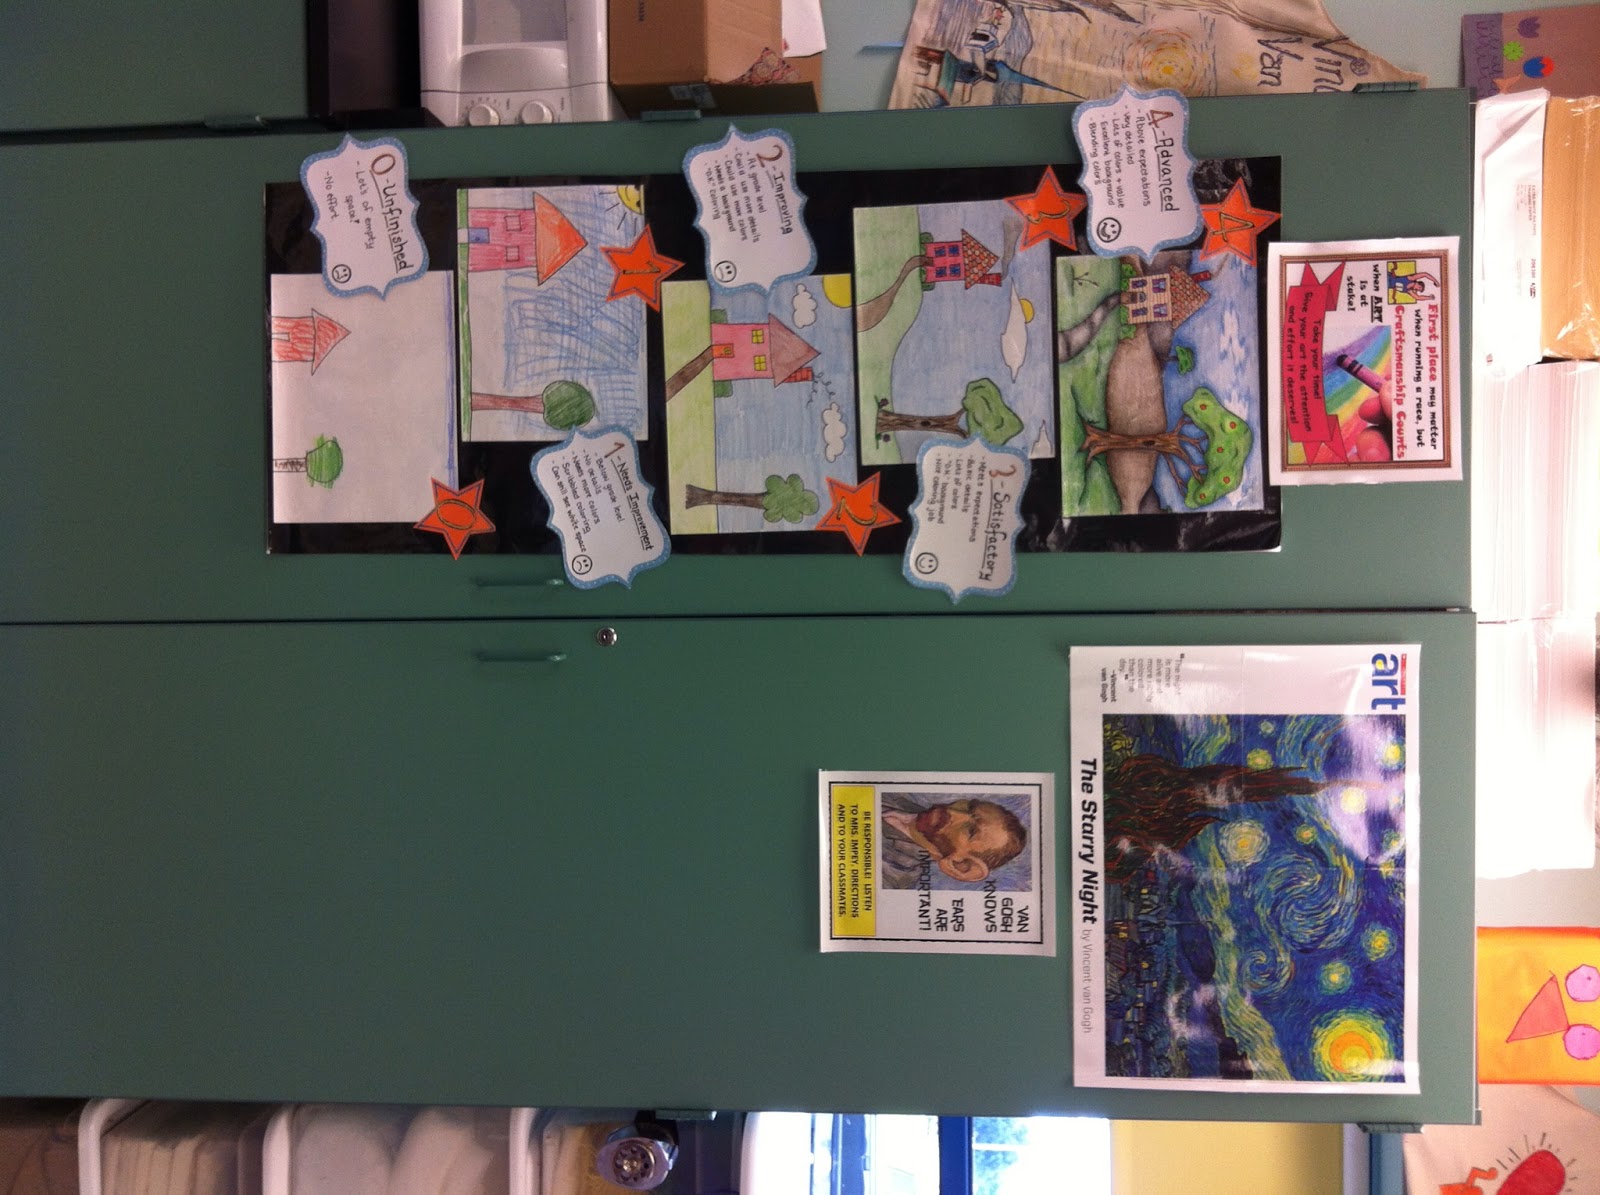
This is the front of one of my huge paper cupboards.  I have my craftsmanship rubric posted here and my rule about being "all ears"!  I took a lot of my rule formats from Ball's Bluff Elementary.
Inside of my huge paper cupboard...It was a huge mess by the end of last year!


One of my three construction paper cupboards...
-----------------------------------------------------------------------------------------------------------------

My tote bins for each table are organized!  I will be making a sign with these pictures to hang on the window behind them to remind students how they should be putting these away at the end of class.  Not sure if I'm going to keep these bins this way or take the crayons out, but this is what I have so far!
-----------------------------------------------------------------------------------------------
New tactic I saw on Pinterest for trying to tackle the "no-name" papers.  I will also have a "no name" bin up in the front of the room.  Courtesy of One Crayola Short!

Another blog find at Draw the Line...hopefully this will help the kindergartners be more organized at the sinks!

My table labels...I went with clear packing tape around the edges, so we will see how well this will last!
 ----------------------------------------------------------------------------------------------------
And my word wall...How many of you have a word wall and how do you use it?  Do you have one big wall for all your grades...or do you separate it into sections for each grade level you teach?  I am thinking that I may separate it into grade level...at least maybe K-1, 2-3, 4-6...
---------------------------------------------------------------------------------------------------------------------------
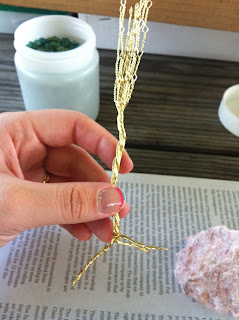
I've been working on spray painting bottles as they become empty to use them for still life drawings.  Hopefully this will make it easier for the younger kids to observe shadows when working on a still life!

One of my new buys for my classroom this year and I'm curious as to how it will work!  Does anyone out there have this in the classroom?  Did I waste my money or is it a decent buy?
-------------------------------------------------------------------------------------------------------------------------------

I love these Garfield parodies!  They are from a calender I had when I was younger.  I hung these up my first year of teaching at the younger kids loved them!  They're making a comeback this year!


Sunday, August 19, 2012

Floor mural is done!

Today was the final day for working on the floor mural in my student's play house!  It looks AMAZING!  I'm really jealous that I didn't have a play house like this when I was younger!  There was a little more I would have liked to have done to this, but after approximately 15 hours of working on it, I think the kids were petered out, and so were the adults!  For the entire mural, we had two adults (myself and her mom included), and four different kids (2 fourth graders, 1 fifth grader and 1 2nd grader) work on the mural at any given time.  Check it out!

Painting the koi fish.  

Painting turtles!

Adding daisy flowers in the grass...

All finished!  Our stream!

Close up of the turtles...I love the little one!

Our koi pond...wanted to add lily pads but everyone tired out!

The end of the cobblestone path.

The whole cobblestone path!


Friday, August 17, 2012

Table Organizers

Is it bad that I just can't seem to relax these last few weeks before school starts?  Everyone thinks I'm crazy because that's all I seem to do is get myself prepared for school, a month before it starts!  I will say this though,  I have a motto to always be prepared and I look at it this way...the first month of school, I will be so ahead in my work, all I will have to do is write my SLO's based on my pre-assessment data!

Anyways, today I worked on getting my table organization materials ready to go to school.  Last year, I numbered my tables 1-6 and then at each of the four seats around each table, I put a different shape.  My intentions were that when clean up came around, I would say, "All the squares, put the supplies away.  All the circles, collect papers at your table..." etc.  That never really seemed to work for me, particularly because the kids kept picking the shapes off the edge of the tables and I couldn't keep up with putting them back on!

After visiting Mrs. C's blog Rainbow Skies and Dragonflies and seeing her table labels, I'm going to try her technique this year!  I decided to color code my tables to the colors of the rainbow instead of numbers this year.  I would really like to hang these from the ceiling, but my district is really strict about not being able to hang stuff from the ceiling.  I'm actually really surprised they let me stack papers and left-behind art projects on top of my tall cupboards!

Anyways, last week I went to target and bought table totes.  It was my intentions at the end of last year to use these to hand out supplies rather than handing out pencils, erasers, etc. separately.  Not sure why I didn't think of it sooner...I think it's because that's the system the previous teacher used.  Well, target only had three colors of these totes left: orange, red and green.  So, I bought two of each and was going to number them 1-6...but I knew that if I was going to color code all my tables, this would confuse the kids, so today, I broke down and drove into town to spend $30 on spray paint.

Ugh!  I should have driven the 40 minutes to Lowes where it would have been cheaper, but instead I drove the 10 minutes to the local Ace and bought red, orange, yellow, green and blue spray paint.  No one seems to have purple!  Here are my totes in the process of being sprayed!
I had to get a little creative with the purple since I couldn't seem to find the purple spray paint locally.  (If I'd have wasted the gas to Lowes, I probably would have found it!)  I sprayed light coats of red and blue alternately.  It looks good from far away, but up close you can see that I had to use the two different colors.  I just need to get over my OCD about that and leave it before that tote has 20 layers of paint on it!  I think I'm going to add white polk-a-dots or something to these to dress them up a bit.

After letting those dry, I worked on creating the table labels.  I decided to continue with the paint palette theme I seem to have going this year (my Artist of the Week display).  I plan to laminate these so that they can't have any water damage.  I'm unsure if I will use duct tape or clear packing tape.  Anyone know which works better?